


How to Make Beer
If you're thinking about brewing homemade beer for the first time, the process can seem a bit intimidating. Looking at a recipe, there’s all sorts of special words and terms you might not know, like what exactly is the difference between an all-grain and partial mash?

But don’t fret, once you get going it’s really not all that hard to make great tasting refreshing beer at home, and it can be as simple or scientific as you want it to be. In this post we’ll take you step by step through the beer making process, looking at:
- The basic ingredients that go into all beers
- The necessary equipment and set-up
- The various methods and products available to make beer with
- The basic process of brewing the beer itself
Beer Ingredients
The world of beer is an incredibly diverse one. Beer can be pale, bitter, black, sweet, fruity, refreshing, or savoury. However, no matter the kind, all beer shares the same basic 4 ingredients that determine its look, taste, and feel:
- yeast
- fermentable grain-based sugar
- hops
- water
Playing around with any one of the ingredients changes the style of beer that’s made. Here’s a run-down of what each ingredient is, and the importance of it in beer making.
Beer Yeast
Beer by definition is a fermented alcoholic beverage, usually made from grain and hops. Yeast is the key ingredient to create alcohol. Simply put, yeast is a living organism that, in brewing, is used to convert (or eat up) the sugar in wort (unfermented beer) to produce alcohol. As this happens, flavours change and sweet malted grain water (wort) can be turned into beer. In beer making there are numerous different styles of beer yeast that can greatly affect the overall character of the beer. In fact, different types of yeast are responsible for the split in styles of beer, namely ales and lagers.
Danny's offers all different styles of dry beer yeasts
We also have a beer yeast chart to compare specific beer styles
Fermentable Grain-based Sugar
Yeast and hops play a role in determining the style and bitterness of the beer you’re making, but the fermentable sugars are where you get the bulk of the flavour and texture in the beer. Before we get into the specifics of these sugars, it will be helpful to explain some terms first:
- Grain - Grains are the fruits of grasses. They are generally small hard seeds that can be used for a variety of cooking purposes. Some examples are corn, barley, and wheat. Grains are not generally capable of fermentation without processing them by “malting.”

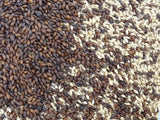
- Malt – Unlike fruit-based sugars used in wine, grain-based sugars aren’t naturally fermentable right off the plant. That means that while they have some sugar in them, it has more starch - and yeast can’t digest starch very well that then converts into alcohol. For the barley grain to become "fermentable", grains have to be “malted” which in general terms is the process of sprouting and then toasting them. When you hear the word malt or malt extract, its referring to a fermentable grain-based sugar. Different malts are based on the grain that was malted, and also the drying and toasting process that was used. Malted barley, for instance, can be both light or dark and roast dependent on how it is malted.
- Base Malt - When you see or hear the term “base malt,” it refers to the primary fermentable malt in your recipe. There can be many kinds of malts - or sugars - in a recipe, but the one of the greatest amount is referred to as the ‘base malt.’
- Specialty/Secondary Malt - In contrast to the base malt, these are simply other malts that are used in a recipe to add a particular flavour, colour, or texture to the beer. For instance a malt called "roasted barley" and "chocolate malt" are often used in Stouts to create it’s signature dark colour.
- Adjunct - An adjunct is simply an additive to a beer recipe that does not classify as a secondary malt. They can be pretty much anything from oatmeal to oranges. Adjuncts are used to give beer a more specific character.
Now that we have some of the terminology taken care of, let’s get into the four main categories of grain-based sugars:
- Malted grains
- Liquid malt extract
- Dry malt extract
- Dextrose
Malted Grains - Barley, Rye, Wheat
Malted grains are the ultimate source of grain-based sugar, as they are, in fact, grains. All other types of malt extract originate from this initial source. Malted grains come in several different styles and there are an infinite number of combinations to create recipes from. To use malted grains in brewing you have to extract the sugar from them by milling and then a process called mashing. This is explained in more detail under the Beer Making Process section.
Liquid Malt Extract (LME)
Liquid malt extract is a syrupy sugar substance (say that 3 times fast) that has been extracted from the grains. It comes in a variety of styles for various recipes. The purpose behind liquid malt extract is that it’s easy to use, because you can skip the milling and mashing stages when brewing. Instead, you simply have to blend well with water.
Dry Malt Extract (DME)
Dry Malt extract is a powdery sugar substance that has been extracted from the grains. Like liquid malt, it also comes in a variety of styles based on colour and depth. It is also designed for ease of use because it is blended in with water.
Dextrose
Dextrose is a corn based sugar that is often used to supplement malt sugars in beer recipes and kits - a sweeter wort can result in a stronger beer. It is also less expensive than malt sugars. Dextrose has a more neutral flavour in comparison to other sugars and does not really add anything to a recipe besides the sugar/potential alcohol.
Hops
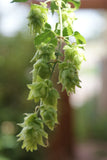
Hops are the next most important recipe in beer making. Not only do they dictate the bitterness in beer, they also can add a depth of flavour as different strands are noted for their citrus, pine, or floral notes. Virtually all beer contains hops to balance the malt sugars, even if it is not in a large amount.
Hops are the flower of the hop plant and there are several strands of them grown all over the world for specific flavours. They are available in leaf and pellet form, and are often preserved in the freezer. The main thing to keep in mind when choosing hops for beer brewing is their “Alpha Acid” content. Alpha acids are what create the bitterness in beer when boiled into a wort. The higher the alpha acid content, the more bitterness you will get out of the hop. Alpha acids take some time and heat to extract, and different hops can be added at different stages of the brewing process. This leads into different terms:
Water
Water often makes up over 90% of any given beer and can’t be overlooked in homebrewing! As a key ingredient, the characteristics of the water you use can have a big impact on the beer you make. Your first priority when choosing a water source is of course to ensure that it is sanitary. Unwanted bacteria can easily contaminate beer and ruin your hard work. Other questions to ask yourself when choosing a water source are:
- Is my water chlorinated?
- What is the pH level of my water?
- Is my water hard or soft?
- Are there any minerals and nutrients present in my water?
In general, your water for homebrewing should be dechlorinated. Minerals and nutrients are beneficial to the yeast you depend on for fermentation. Different beer styles may call for different water profiles. This is a more advanced topic. If you are using city water, focusing on the dechlorination of water is what is most important part in home beer making. For more information on water, such as how to dechlorinate or alter pH, see our post all about water used in homebrewing beer.
And those are the 4 main ingredients of beer making. If you think it might be difficult to craft a recipe from scratch while taking into consideration all four, don’t worry. In the “Methods” section we will highlight different brewing techniques and introduce some products that take care of some of the work for you.
Necessary Brewing Supplies for Brewing Your Own Beer
Cleaners and Sanitizers
Before we move on to talk about equipment, methods, and process, it’s important to note a few things about sterilizers and cleaners. For one, proper sanitation of equipment will often make the difference between a good batch of beer and bad one. Sanitize, Sanitize, Sanitize! It doesn’t matter how good the recipe is; if it becomes contaminated with unsavoury bacteria it won’t taste good.
That being said, there are a few things to take into consideration when cleaning and sterilizing your equipment. To begin with, what’s the difference? Simply put, cleaning involves removing physical contamination like stains and caked on material that you can see with the naked eye. Sanitizing involves making sure as much bacteria as possible is removed from your equipment, usually with the aid of a sanitizing product. There are a number of products like this to help you:
Want more information on cleaning and sterilizing?
The Two Phases of Brewing Beer
In beer making there are two main phases that take place:
- The creation of the wort by extracting sugars and flavours from grains and hops
- The fermentation of wort into beer that is then stored for drinking.
Each of these processes requires different equipment. However, different products, such as sterile wort kits, concentrated beer kits, and partial-mash recipes allow you skip all or part of the first stage. Therefore you don’t necessarily need all the equipment that will be reviewed here to make beer - depending on the method you choose, you may only need the equipment necessary for fermentation and bottling.
The different methods will be explained in the following section, but first we will go over the equipment:
Brewing Supplies for Creating Wort
The creation of wort from the basic ingredients of malted grains, hops, and water centers primarily around a heat source such as a gas burner or stove top. There are numerous methods to create wort using different equipment, but here are the basics:
Note: If transferring very hot or boiling liquids, make sure that the tubing meets heat requirements. Be careful! You may easily burn yourself and some plastics can warp in extreme heat.
These are the basic equipment you will need to create wort from scratch. To avoid some of the hassle while still having complete control over the recipe and fresh ingredients, there are products that have all of these things built into one. The Grain Father All-In-One Brewing System is an excellent option which you can load your ingredients into. It continuously measures the time and temperature, controls the different processes, and will even add the hops in at the specified time and rate. To top it off it can be controlled with your phone!
Brewing Supplies for Fermenting and Storing your Beer
In general, the basic equipment for this stage can be broken down into 3 categories:
- Containers
- Stoppers
- Tools
Containers: When making beer you will need a minimum of 2 kinds of containers, and possibly a third:
- A primary fermenter to begin the fermentation in. Buckets tend to make great primary fermenters because they are easy to clean and have extra space for blow off when the beer is very foamy.
- A secondary fermenter to stabilize and condition the beer in. Secondary fermenters should be glass or plastic carboys with minimal headspace, so that the beer isn’t exposed to too much air.
- If you don’t plan on conditioning your beer for very long before bottling, you can also opt for ‘Single-Stage Fermenting,’ where you only use one container. Some customers have found that using a conical fermenter is advantageous for this type of brewing.
- Vessels to store and serve the beer. Bottles or kegs are necessary to carbonate and store the beer in when it is finished.
Closures/Stoppers: These are used to protect the beer from contamination and aeration during fermentation and after bottling. When beer is in the primary and secondary fermenters you will want to have an airlock and rubber bung. These will seal the beer from outside contaminants, while also letting the gasses from fermentation to escape. Plastic caps, crown caps, or kegs can then be used to seal the beer when it is finished.
Tools: There are plenty of beer making tools that make the experience easier and can be used to enhance the quality of the beer you produce. However, if minimalism is what you’re after there are only a few that are absolutely necessary. They are:
- A hydrometer - to measure the sugar content of the wort.
- A test tube - to use with the hydrometer.
- A thermometer - to measure temperature.
- A siphon - to transfer beer between the containers and into bottles.
- A capper - if you capping glass beer bottles
- A brush - to clean carboys.
If this is your first time don’t fret, Danny’s has a number of all-in-one starter equipment kit ready to pick-up in store or ship. Browse equipment kits here.
Beer Making Methods
As mentioned before, there are several methods of making beer to choose from. Regardless of the method you pick there is a world of opportunities to try new styles and influence the flavours you want in your very own craft beer. The four main methods of brewing are from sterile wort, concentrated wort kits, partial mash kits, and all-grain brewing. The basics of each will be reviewed here:
Sterile Wort Kits
Using Sterile Wort kits, such as Festa Brew boxes, are an excellent no fuss way to enjoy great tasting beer at home and are great for first-time brewers, or for those who just don’t have a lot of time to brew. Each box contains a 23L (6 gallon) bladder full of pre-hopped, ready-to-go wort, along with a specific craft series dry beer yeast, and instructions. It takes care of the entire first stage of wort creation for you, so all you have to do is ferment it into beer and store it in bottles or kegs. After that, it’s all about the enjoyment. Sterile Wort Kits are available in a wide variety of flavours such as Wheat Ale, Blonde Lager, and Double Oatmeal Stout.
Concentrated Wort Kits
Concentrated Wort Kits often come in cans such as Coopers DIY Beer kits, or more recently in brewery pouches by Mangrove Jack’s. Like sterile wort kits, the contents of these kits is pre-hopped so you don’t have to worry about the wort creation stage. They also usually create 23L (6 gallons) and include brewers yeast and instructions. To make these kits, you have to reconstitute them, or in other words add water to them and mix them thoroughly. They also require you to use sugar such as dextrose or dry malt extract prior to fermentation.
Partial Mash Kits
These kits or recipes are the best of both worlds between all-grain brewing and pre-hopped wort. They cut out the hardest parts of wort creation (milling and mashing for sugar extraction), while also giving you more control over the other ingredients. Partial mash kits tend to include liquid and/or dry malt extract, specialty malts, hops, specific craft brewing yeast, and instructions. They may also require dextrose for additional sugar, and of course water.
Brewing this way still lets you skip the mashing stage and gives you a compact kit and set of instructions, but also sets you up to explore the world of brewing a little further. Since the ingredients are separated, they are easily customizable - want to use more or less hops or a different kind of hops altogether? Go for it! Want to add in more specialty malt, it’s your choice! Want to pick a different yeast? Why not?
If your interested in partial mash kits and recipes, check out some of our own - ready to ship or pick-up in store!
All-Grain Brewing
Brewing from all-grain is the original method of beer making, and it is here where the world of beer really opens up with an infinite number of possibilities. It’s exciting to know that crafting recipes and your own original beers with basic fresh ingredients is something you can do right at home! However, if it is your first fermenting alcohol at home, it can be a daunting process to get the hang of. If you are brand new to all of this, it’s recommended to start with a kit - it’ll give you a chance to experience the process in a more guided way before jumping right in.
Disclaimers aside, all-grain brewing entails creating the wort from scratch. The specifics of the beer making process will be explained in the following section, but the benefit of all-grain brewing is clear: complete control over what and how much beer you make.
To browse our fresh ingredients and recipes see here.
The Basic Beer Making Process
As mentioned earlier, there are two distinct phases of the beer brewing process. The creation of wort, and the fermentation and storage of the beer. No matter the style of beer you are making the process is generally the same. In this section we will break down the process of those two phases. If you are using a sterile wort, concentrated wort, or partial mash kit you can simply follow the instructions on how to mix the ingredients together and then skip to the second section: Fermentation and Storage.
10 Steps to Creating Wort for Beer Making
You will want to heat the required amount of water in your pot or kettle first. Recipes specify the exact temperature you want, usually somewhere between 145-158°F (63-70° C). If the temperature is too low or too high, it can have adverse effects on the flavour and sugar extraction of the mash. For this reason you’ll want to constantly monitor the temperature of the mash with a thermometer and stir it occasionally to prevent large temperature differences between the top and bottom of your heating element. As mentioned above, if you don’t have a lautering tun or kettle with a spigot, you may want to place your grains in a mesh bag during this phase.
7 Steps to Fermenting and Storing Your Beer
You’ve brewed your beer! Now, it’s time to enjoy the fruits of your labour. Do you have a favourite beer recipe? Have you made beer from the kits we discussed? Did you enjoy the process? Let us know in the comments below!
Leave a comment